Ever felt the frustration of tossing out perfectly good food because it’s gone bad too soon? Or perhaps you’ve pulled a steak from the freezer, only to find it ruined by nasty freezer burn? If so, you’re not alone. Many home cooks face these challenges daily, leading to significant food waste and wasted money. But what if there was a simple, effective solution? Enter the Best Food Vacuum Sealer, a game-changing kitchen appliance that can revolutionize how you store, prepare, and enjoy your food. It’s more than just a gadget; it’s an investment in freshness, flavor, and financial savvy.
What Exactly is a Food Vacuum Sealer, and Why Do You Need One?
At its core, a food vacuum sealer is a device designed to remove air from a bag or container before sealing it shut. Why is this important? Oxygen is the primary culprit behind food spoilage, causing oxidation, freezer burn, and the growth of microorganisms. By removing the air, a vacuum sealer creates an anaerobic environment, dramatically slowing down these processes. This means your food stays fresher, longer, retaining its taste, texture, and nutritional value. Think about buying those fresh berries; a vacuum sealer can keep them vibrant for days longer than traditional methods. For anyone serious about reducing waste and maximizing their groceries, understanding the “why” behind the best food vacuum sealer is the first step.
Choosing Your Perfect Kitchen Companion: Types of Food Vacuum Sealers
When you’re on the hunt for the best food vacuum sealer, you’ll quickly realize there isn’t a one-size-fits-all answer. The ideal choice really depends on your specific needs, cooking habits, and kitchen space. Let’s break down the main types you’ll encounter and what makes them tick.
External Vacuum Sealers
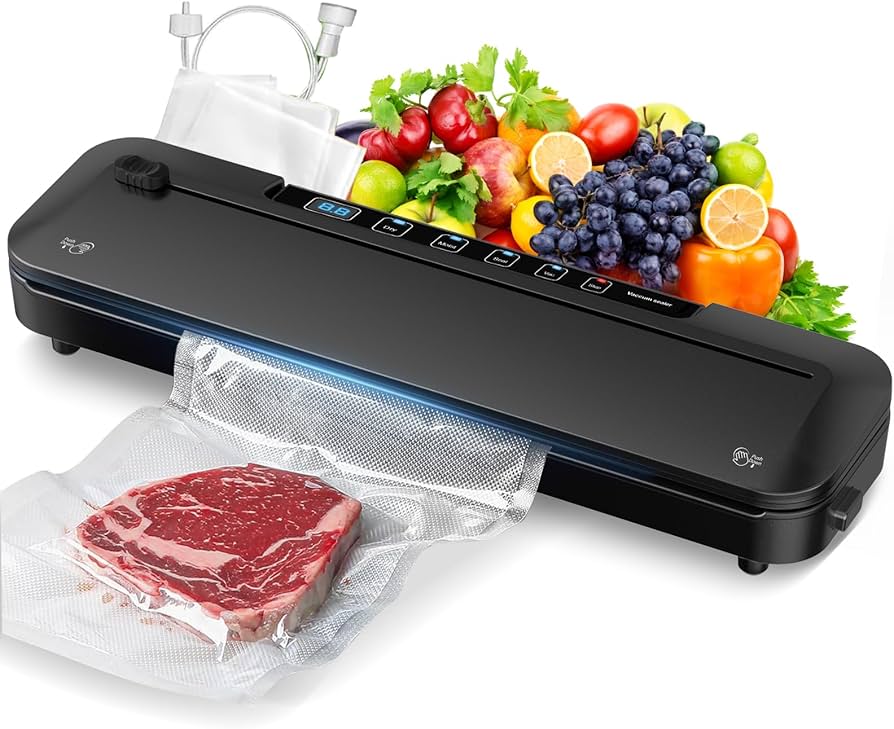
These are by far the most popular choice for home kitchens. External sealers work by placing the open end of a specially textured bag into the machine’s vacuum channel. The machine then sucks out the air and seals the bag with heat.
- Pros: Generally more affordable, compact, and easy to store. Great for dry goods, solid foods, and batch cooking.
- Cons: Not ideal for liquids or very delicate items, as the vacuum can crush them or draw liquids into the machine, potentially damaging it. Requires specific embossed bags.
- Best For: Everyday home use, freezing meats, storing pantry staples, meal prepping.
Chamber Vacuum Sealers
Often seen in professional kitchens, chamber sealers are a different beast entirely. With these, you place the entire bag inside a chamber. The machine then depresses the entire chamber, sucking air out of the room, then seals the bag. Because the pressure inside and outside the bag is equal, liquids don’t get sucked out.
- Pros: Perfect for liquids, soups, sauces, and delicate items like soft cheeses or pastries without crushing them. Can use less expensive, smooth bags. Unbeatable for heavy-duty, high-volume sealing.
- Cons: Significantly more expensive, much larger, and heavier than external sealers. Not practical for most home kitchens due to size and cost.
- Best For: Serious home chefs, small businesses, hunters, or anyone frequently sealing liquids and delicate foods.
Handheld Vacuum Sealers
These compact, battery-operated devices use special zipper-top bags with a valve. You attach the handheld unit to the valve, and it quickly extracts air.
- Pros: Very portable, convenient for quick, frequent sealing of small items or leftovers. Takes up minimal storage space.
- Cons: Less powerful vacuum than full-sized models. Bags are often proprietary and can be more expensive.
- Best For: Snacks, sandwiches, small portions, maintaining freshness of open packages, or travel.
Key Features to Consider When Choosing
Once you’ve narrowed down the type, here are crucial features to look for to ensure you pick the best food vacuum sealer for you:
- Suction Power: A stronger motor means a more thorough air extraction and a tighter seal. Look for models with good reviews on vacuum strength.
- Moist/Dry Settings: This is a game-changer! These settings adjust the sealing temperature and vacuum time, preventing liquids from being drawn into the machine when sealing moist foods.
- Accessory Port: Allows you to connect a hose to vacuum seal food in specialized canisters, jars, and wine stoppers. Fantastic for delicate items or pantry organization.
- Built-in Bag Storage and Cutter: A small convenience that makes a big difference, allowing you to easily cut custom-sized bags without fumbling for scissors.
- Pulse Function: For delicate foods like bread or chips, a pulse setting lets you manually control the vacuum pressure, preventing crushing.
- Ease of Cleaning: Look for models with a removable drip tray, which makes cleaning up any accidental liquid spills much simpler.
- Durability and Warranty: This is an investment. Check reviews for reliability and ensure the manufacturer offers a decent warranty.
Mastering the Art: A Step-by-Step Guide to Using Your Vacuum Sealer Effectively
Getting the most out of your vacuum sealer isn’t just about buying the right machine; it’s about mastering the technique. Here’s how to use your best food vacuum sealer like a pro:
1. Preparing Your Food Properly
Preparation is paramount. Always ensure your food is clean and dry before placing it in the bag. Excess moisture, especially around the seal area, can lead to a weak or failed seal. For very moist foods like raw meat, consider pre-freezing them for about 20-30 minutes until they’re firm, or place a small piece of paper towel near the opening to absorb any last-minute moisture.
2. Choosing and Filling Your Bags
- Bag Type: For external sealers, use textured vacuum sealer bags; for chamber sealers, smooth bags are fine.
- Don’t Overfill: Leave at least 2-3 inches of space between the food and the top of the bag. This ensures there’s enough room for the machine to create a strong, airtight seal without food interfering.
- Smooth Opening: Make sure the inside and outside of the bag’s opening are clean and free of food debris, crumbs, or moisture. Even a tiny crumb can compromise the seal.
3. The Sealing Process
- Placement: Insert the open end of the bag flat into the vacuum channel of your machine. Make sure it’s positioned correctly according to your sealer’s instructions.
- Close and Lock: Close the lid or engage the locking mechanism (this varies by model). The machine will then automatically begin the vacuuming process.
- Monitor: Some models have progress indicators. Pay attention, especially if you’re using a pulse function for delicate items.
4. Checking Your Seal
Once the cycle is complete, always inspect the seal. It should be straight, fully fused, and airtight. If it looks uneven or incomplete, simply cut off the old seal and re-seal the bag. A good seal is crucial for long-term freshness.
Unlocking All the Perks: The Transformative Benefits of Vacuum Sealing
Investing in the best food vacuum sealer isn’t just about preserving food; it’s about unlocking a world of culinary convenience and savings.
Extend Shelf Life & Reduce Waste
“Vacuum sealing extends the life of food by removing the air that causes spoilage, keeping your groceries fresh and tasty for significantly longer,” says Dr. Eleanor Vance, a leading Food Preservation Specialist. Fresh foods like vegetables, fruits, and meats can last 3-5 times longer in the fridge. In the freezer, vacuum-sealed items can last for a year or even two without losing quality, compared to just a few months with traditional storage. This dramatically reduces how much food you throw away, saving you real money in the long run.
Wave Goodbye to Freezer Burn
Freezer burn is the arch-nemesis of frozen food. It occurs when air comes into contact with food in the freezer, causing dehydration and oxidation, leading to dry, discolored, and flavorless patches. Vacuum sealing eliminates this by creating an impenetrable barrier against air, ensuring your frozen foods maintain their moisture, texture, and taste, tasting as good as the day you sealed them.
Elevate Your Cooking: Sous Vide & Marinating
For those who love to cook, a vacuum sealer opens up exciting possibilities:
- Sous Vide: This precise cooking method involves sealing food in a bag and cooking it in a temperature-controlled water bath. Vacuum sealing is essential for sous vide, ensuring even cooking and incredible tenderness.
- Marinating: The vacuum process can accelerate marinating. By drawing air out, the marinade is forced deeper into the food’s fibers, infusing flavor in a fraction of the time compared to traditional methods.
Smart Storage & Organization
Vacuum-sealed packages are compact and airtight, making them perfect for organizing your pantry, fridge, and freezer. No more bulky, oddly shaped containers taking up precious space! It’s also great for non-food items, protecting valuables, documents, or camping gear from moisture and corrosion.
Common Pitfalls and Smart Solutions for Vacuum Sealing Success
Even with the best food vacuum sealer, a few common mistakes can lead to less-than-perfect results. But don’t worry, they’re easy to fix!
Mistake 1: Wet Edges or Crumbs on the Bag Opening
Problem: Moisture or food particles prevent a strong, airtight seal.
Solution: Always wipe the inside and outside of the bag’s sealing area clean and dry. For very moist foods, place a paper towel at the top of the bag to absorb moisture or use your machine’s moist setting. Pre-freezing liquid-rich foods slightly can also help.
Mistake 2: Overfilling Bags
Problem: Not enough space for the sealer to create a proper seal, leading to an incomplete vacuum or weak seal.
Solution: Leave at least 2-3 inches of empty space at the top of the bag. This provides ample room for the heat bar to fuse the plastic securely.
Mistake 3: Neglecting Delicate Foods
Problem: Full vacuum suction can crush soft items like bread, chips, or berries.
Solution: Use your machine’s “pulse” function, if available, which allows you to manually control the vacuum intensity. Stop the vacuum before the food is crushed, then hit the seal button. Alternatively, pre-freeze delicate items until firm before sealing.
Mistake 4: Skipping Regular Cleaning
Problem: Food particles or liquids can build up in the drip tray or vacuum channel, leading to hygiene issues and affecting performance.
Solution: Clean your vacuum sealer regularly, especially the drip tray. Most drip trays are removable and dishwasher-safe, making cleanup a breeze. A clean machine is a happy, efficient machine.
Expert Insights: What the Pros Say About Your Best Food Vacuum Sealer
“Many people underestimate the power of a good vacuum sealer,” notes Dr. Eleanor Vance, Food Preservation Specialist. “It’s not just about saving space or preventing freezer burn. It’s a critical tool for maintaining the integrity and nutrient density of your food, which is essential for healthy eating and sustainable living. Choosing a model with reliable suction and versatile settings, like moist/dry options, will truly enhance your kitchen efficiency.”
Conclusion
Finding the best food vacuum sealer for your home is an investment that pays dividends in freshness, flavor, and financial savings. By understanding the different types, key features, and effective usage techniques, you can transform your food storage habits, reduce waste, and elevate your culinary game. From extending shelf life and preventing freezer burn to enabling precision cooking with sous vide and rapid marinating, a vacuum sealer is a versatile tool that earns its spot in any modern kitchen. So, take the plunge, explore the options, and start enjoying the incredible benefits of vacuum-sealed freshness today!